I used to think my dinner parties were missing a little something. The food was great, the company was better, but my table setting felt… generic. Then, a friend showed me a set of stunning, hand-painted wine glasses she’d made, and a lightbulb went off. This was the personal, creative touch I was craving! Learning how to paint wine glasses completely transformed my hosting game, turning simple glassware into conversation-starting art. It’s one of the easiest and most affordable budget home décor ideas I’ve ever tried, and I promise, you don’t need to be an artist to create something truly beautiful. Let me walk you through just how simple it is to add this chic, custom element to your home.
Gathering Your Supplies: Everything You Need to Paint Wine Glasses
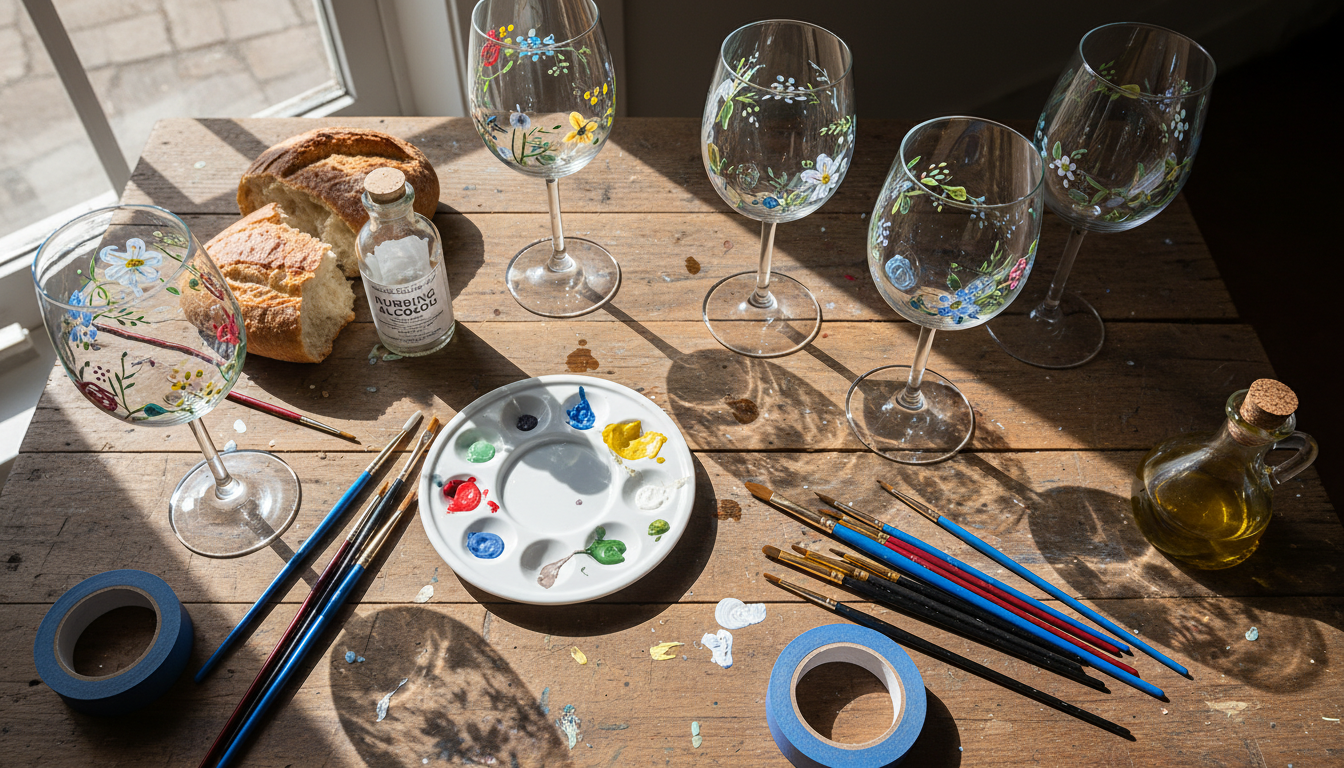
Before you can unleash your inner artist, you’ll need to gather a few key supplies. The good news? You don’t need a fancy art studio or a huge budget to get started.
The Glasses: You can start with a set of incredibly affordable glasses from the dollar store, Target, or even a local thrift shop. This is perfect for practicing without any pressure. If you’re making a special gift or want a more elegant feel, you can always use higher-quality glasses from places like Crate & Barrel. The process is exactly the same!
The Right Paint: This is the most crucial choice. You can't use just any old craft paint. You need a paint specifically designed for glass or a multi-surface acrylic that can be heat-set. My absolute go-to for beginners is an acrylic enamel paint like the FolkArt Enamel line. They are opaque, easy to use, and become permanent after baking. You can find a fantastic starter set like <strong>this affordable one from Amazon that has all the basic colors you'll need. For a more transparent, stained-glass look, brands like Pebeo Vitrea 160 are a dream to work with, though they are a bit more of a luxury splurge.
Brushes & Tools: A small pack of assorted craft brushes will do the trick. Look for a set that includes a few fine-tipped detail brushes for linework and a couple of flat brushes for filling in larger areas. You’ll also want some rubbing alcohol and cotton balls for prep, painter’s tape for creating crisp lines, a paper plate or paint palette, and some paper towels for inevitable clean-ups.
Prep Work: The Secret to a Flawless, Long-Lasting Finish
I know you’re eager to start painting, but trust me on this: spending ten minutes on proper prep work is the difference between a design that flakes off in a week and one that lasts for years. First, wash your glasses thoroughly with warm, soapy water to remove any dust or price stickers, and dry them completely. The next step is non-negotiable: wipe down the entire surface you plan to paint with a cotton ball soaked in rubbing alcohol. This removes any lingering oils from your fingerprints that can prevent the paint from adhering properly. Let it air dry for a minute or two.
Now, plan your design! You can sketch ideas on paper first or just go for it. For clean, geometric patterns, use painter’s tape to mask off sections. You can create stripes, chevrons, or color blocks with this method—it's one of my favorite small apartment decorating hacks for creating a coordinated look. Stencils are another fantastic option for creating intricate patterns without needing to be a master illustrator. Or, simply embrace a more organic, freehand approach with dots, swirls, or simple florals.
Pro Tip: Always leave about an inch of space from the rim of the glass unpainted. Even with non-toxic, food-safe paints, it's best practice to ensure your lips only touch the glass itself, not the painted surface.
Let's Get Painting! Fun Techniques for Every Skill Level
This is where the magic happens! Pour small dabs of your chosen colors onto your palette. Remember that with glass paint, a little goes a long way. If you make a mistake, don’t panic! While the paint is still wet, you can easily wipe it away with a damp paper towel or a cotton swab dipped in rubbing alcohol. Let's explore a few easy but impressive techniques:
Simple Polka Dots: The easiest and most classic design! Simply dip the wooden end of your paintbrush into the paint and press it onto the glass to create perfect, uniform dots. Vary the sizes and colors for a playful, whimsical look.
Modern Abstract Swipes: Use a flat brush to make broad, confident swipes of color around the base or bowl of the glass. Overlap a few complementary colors for a chic, artistic effect that looks incredibly high-end.
Delicate Botanicals: You don't need to be an expert to paint a pretty leaf or flower. Start with simple comma-stroke leaves and use the dotting technique for the center of a flower. This airy, elegant style adds a touch of cozy living room inspiration to any bar cart.
Sponged Ombré: Use a small piece of a makeup sponge to dab paint onto the glass, starting with your darkest color at the bottom and gradually getting lighter as you move up. This creates a beautiful, blended gradient effect.
Work in thin, even coats. It's better to apply two thin coats (letting the first one dry for about an hour) than one thick, gloopy one. Have fun and let your creativity flow!
The Final Step: How to Cure Your Painted Wine Glasses for Durability
You’ve created your masterpiece, and it looks amazing! Now, we need to make it permanent so you can actually use and wash it. This process is called curing, and it's the most important step for a durable finish. You have two main options:
1. Air Curing: This is the easiest method—it just requires patience. Simply let your painted glasses sit undisturbed in a safe, dust-free place for about 21 days. After three weeks, the paint will have fully hardened and bonded to the glass. This is a great option if you’re not in a hurry or are hesitant to use your oven.
2. Oven Curing (Recommended): This is the method I almost always use because it’s fast and incredibly effective. Please follow these instructions carefully to prevent your glasses from cracking! First, place your fully dried (to the touch, usually after 24 hours) glasses on a baking sheet and put them into a COLD oven. Do not preheat it! Once the glasses are inside, turn the oven on to the temperature recommended by your paint manufacturer, typically around 350°F (175°C). Let the oven preheat with the glasses inside. Once it reaches the target temperature, set a timer for 30 minutes. After 30 minutes, turn the oven off completely, but DO NOT open the door. You must let the glasses cool down slowly and completely inside the oven. This gradual temperature change is key. Once they’re back to room temperature, they are cured and ready to use!
Pro Tip: Even after oven-curing, it’s always best to gently hand-wash your custom glassware. While many paints claim to be top-rack dishwasher safe, hand-washing with a soft sponge will preserve the vibrancy and integrity of your beautiful design for much longer.
Final Thoughts
And there you have it! See how simple that was? Learning how to paint wine glasses is more than just a craft; it's a way to infuse your personality and warmth into your home, create unforgettable handmade gifts, and unwind with a creative project. Imagine the compliments you'll get at your next get-together! I hope you feel inspired to grab a few glasses and give this a try. When you create your own set, I’d love to see them! Pin this guide for later so you have all the steps ready when inspiration strikes. If you decide to purchase any of the supplies mentioned, using our links helps support this blog at no extra cost to you. Happy painting!